


Laser Marking Machine Engraving Process Step-by-Step
Views :
Update time : 2024-11-25
The engraving process on a laser marking machine is quite simple. Below, we will guide you through each step of the process to help you understand how the machine works and address any potential issues that may arise during engraving, along with solutions.
1. Open the Laser Marking Software
- Start by opening the laser marking software and locate the text icon on the left side of the software’s working area.
Click the icon with the left mouse button, then click anywhere in the working area. This will generate the default text “text” on the screen.
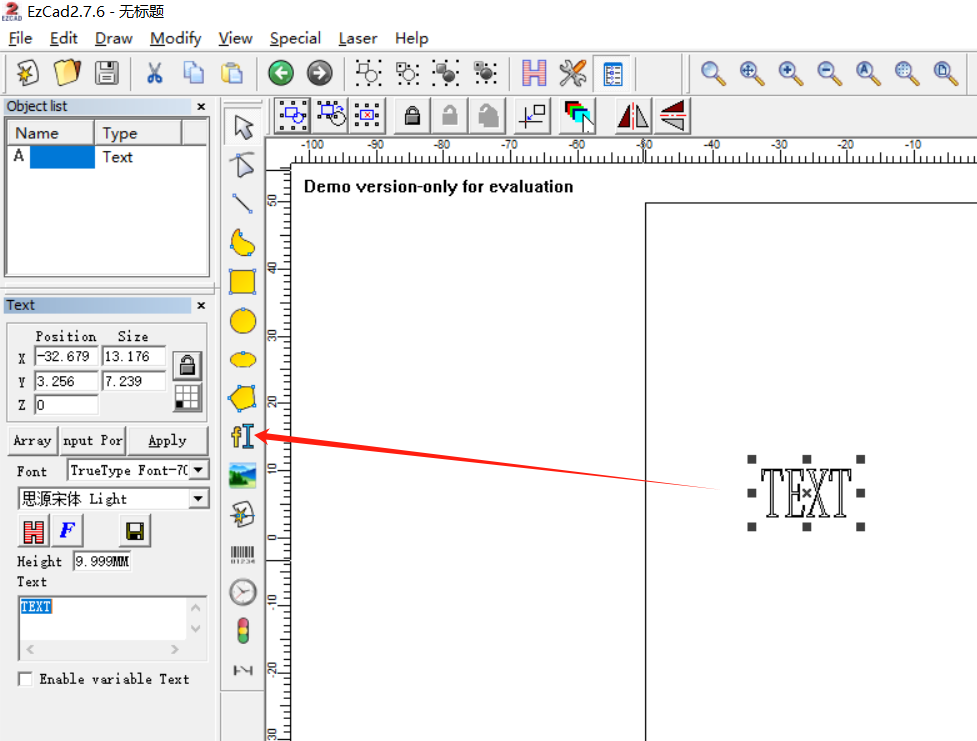
2. Edit the Text
- In the lower left corner of the software, there is a text box displaying "text."
- Change "text" to the text you want to engrave.
From the font selection at the top, choose the font style you prefer. Then click Apply to confirm the changes.
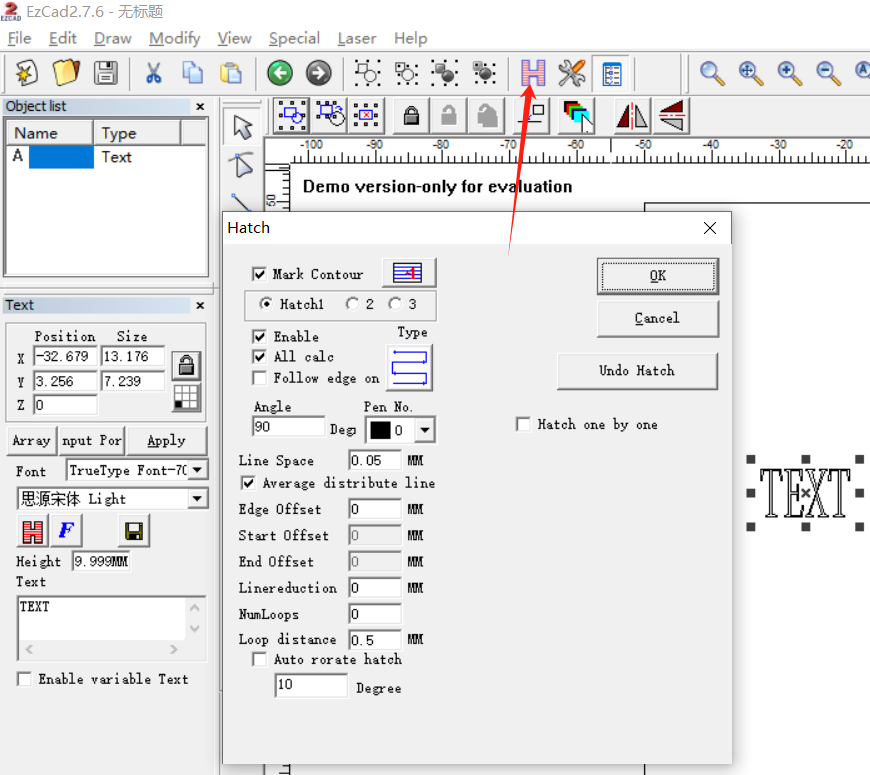
3. Enable Fill and Set Line Spacing
- Click the H icon at the top of the software to enter the fill settings.
- Check Enable Outline and Enable Fill.
- Set Line Spacing to 0.1mm and Ring Spacing to 0.5mm.
Click OK to apply these settings.
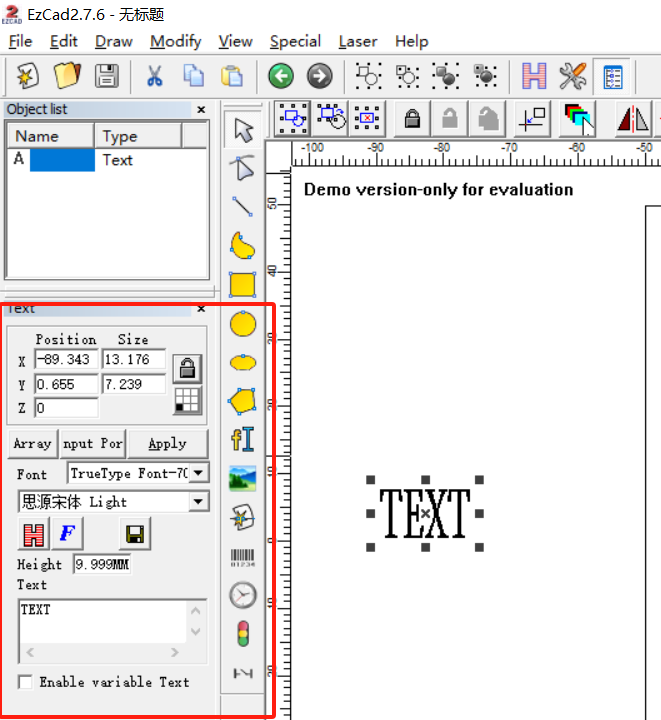
4. Adjust the Dimensions
- Change the size of the engraving by adjusting the X and Y values.
- Set X and Y to the desired dimensions. By default, changing X will automatically adjust Y proportionally.
- If you do not want this proportional behavior, click the small tool next to the X and Y settings to unlock the aspect ratio. You can then adjust X and Y independently.
- Click Apply to confirm the changes.
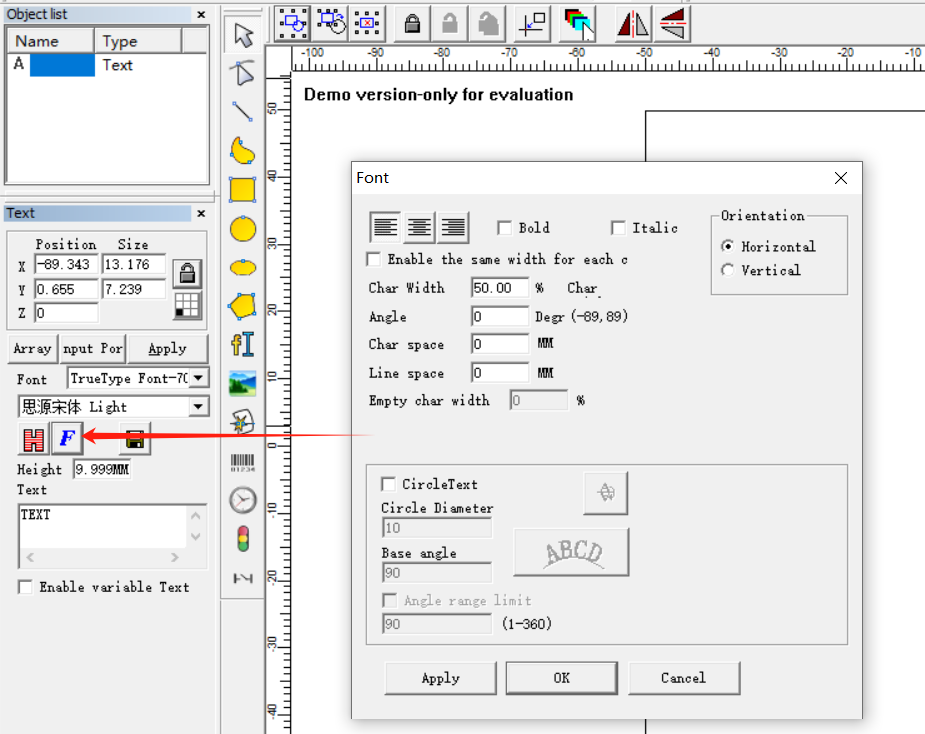
5. Customize Text Formatting
- Click the F icon above the text to access additional formatting options.
- You can enable Bold, Italic, or adjust the alignment to Horizontal or Vertical.
- You can also change the Character Width, Angle, Character Spacing, and Line Spacing.
If you want to engrave text along a curve, check the Arc Text box and set the Diameter and Angle of the curve.
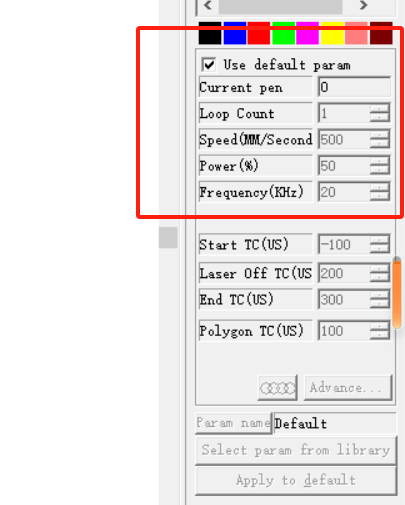
6. Set System Parameters
- Adjust the speed and power settings according to the material being engraved.
- For stainless steel, set the speed to 800, power to 70, and frequency to 20.
For plastic, set the speed to 1000, power between 10-30, and frequency to 20.
7. Start the Engraving
- Click the Red Light button at the bottom or press F1 on the keyboard.
- Place your workpiece in the red frame area.
- Click Mark or press F2 on the keyboard to start the engraving process.
Summary
This is the basic process for engraving text with a laser marking machine. By following these steps, you can easily set up and engrave different materials with the desired text and design.
Related News
Read More >>
 laser marking machine for meta
08 .01.2025
Laser Marking Machines for Metal in Singapore (2024 Guide)Singapore’s manufacturing and precision en...
 laser marking machine price in
08 .01.2025
Here's a detailed breakdown of laser marking machine prices in Pakistan (2024):Laser Marking Mac...
 HS code information of laser m
08 .01.2025
HS Codes for Laser Marking Machines1. General Laser Marking MachinesHS Code: 8479.89.90Description: ...
 20w fiber laser marking machin
08 .01.2025
Here's a concise breakdown of 20W fiber laser marking machine prices in 2025:Price Range (USD)Ca...