How to Set Up Laser Marking Machine Software
Views :
Update time : 2024-11-25
Setting up laser marking machine software is relatively simple. Before using a laser marking machine, you need to complete some basic configurations. However, many users may face issues with after-sales support when purchasing uncertified or low-quality products. Below, we’ll provide a free guide on how to set up laser marking machine software step by step.
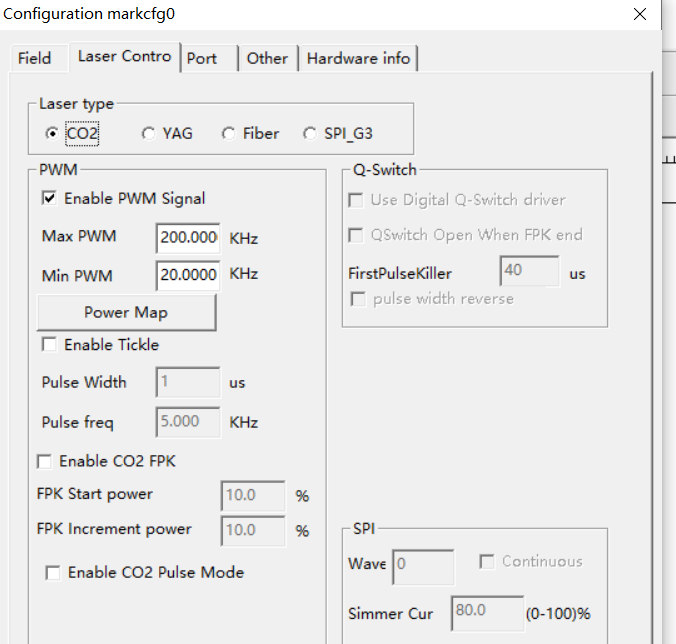
1. Set the Laser Type
- Press F3 on the keyboard or open the parameter settings interface in the software.
- Navigate to Laser Control, then select the type of laser you’re using.
- For example, if you’re using a fiber laser, choose Fiber. If you’re using a CO2 laser, select CO2.
Save the settings after selecting the appropriate laser type.
2. Set the Marking Area or Workspace
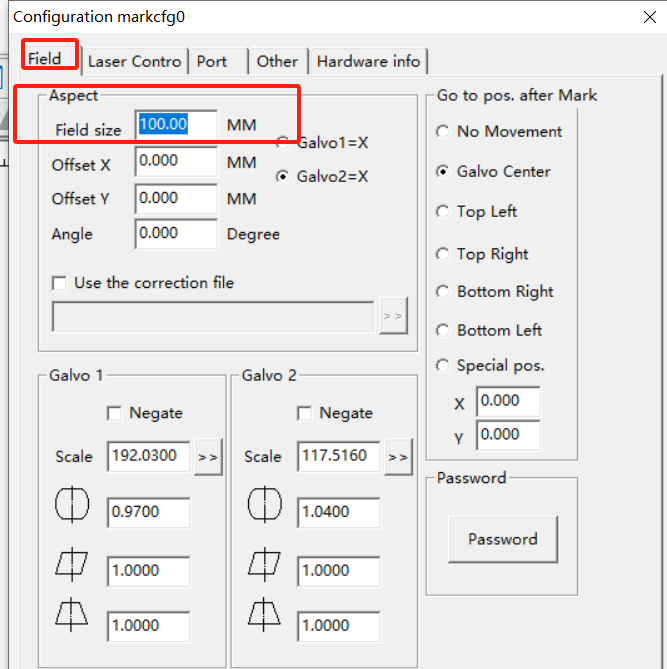
- Again, press F3 on the keyboard or access the parameter settings interface in the software.
- Go to the Workspace Settings section.
- Adjust the workspace dimensions according to the field lens size of your machine.
For instance, if the field lens size corresponds to a working area of 110x110mm, set the workspace to 110mm.
3. Set Laser Parameters
- Laser parameters are located in the bottom-right corner of the software interface (e.g., JCZ software like EzCAD).
- Typically, you only need to adjust Power and Speed:
- Higher power results in deeper and stronger marking.
- Higher speed makes the marking process faster.
4. Text Filling
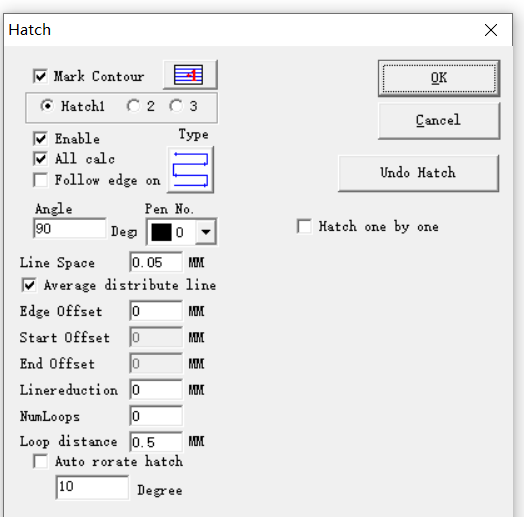
- Filling directly affects the marking result. When marking text, you usually need to set the filling options.
- Configure the filling type based on your requirements. Pay particular attention to the line spacing:
A common setting for line spacing is 0.05mm.
Final Steps
After completing the above steps, your laser marking machine should be ready to operate. However, since each machine may have unique configurations and adjustments, you might encounter additional issues. JunChuang Laser provides various solutions for common problems, which you can refer to as needed.
With these settings, you can confidently set up and use your laser marking machine effectively.
Related News
Read More >>
 laser marking machine for meta
08 .01.2025
Laser Marking Machines for Metal in Singapore (2024 Guide)Singapore’s manufacturing and precision en...
 laser marking machine price in
08 .01.2025
Here's a detailed breakdown of laser marking machine prices in Pakistan (2024):Laser Marking Mac...
 HS code information of laser m
08 .01.2025
HS Codes for Laser Marking Machines1. General Laser Marking MachinesHS Code: 8479.89.90Description: ...
 20w fiber laser marking machin
08 .01.2025
Here's a concise breakdown of 20W fiber laser marking machine prices in 2025:Price Range (USD)Ca...


